- Published on
Smart RGB lights [Part 2] - Creating an app with Expo
- Authors

- Name
- Branimir Kirilov
Intro
In today's world, mobile applications have become an integral part of our daily lives. From ordering food to booking tickets, everything is just a tap away. In the previous post, I talked about building and programming an ESP board. Now, it's time to take this project to the next level by integrating it with a mobile app. In this blog post, I will explore the exciting world of React Native and show you how to create a mobile app that can communicate with the board I previously wired up.
Prerequisites
NodeJS
If you don't have NodeJS, the first step is to download and install it:
Expo
I'll be using Expo to bootstrap and develop our native application.
The Expo platform revolves around React Native, offering a range of tools and services. Among its numerous capabilities, the most pertinent one for our current purposes is its ability to swiftly get you started on developing a React Native app. All you need is a phone or an emulator and a recent Node.js version.
Expo Go mobile app
For the sake of easier debugging, I will use the Expo mobile app. This will allow me to run the app directly on my phone and I would not need to use an emulator.
Design and structure
Now it's time to build the application that will control the RGB lights by communicating with the server running on the Wemos board in my local network.
Design
As usual, the first part of every application is to think about how it will work and how it will look like.
The main features that I need to support are:
- A button that turns on/off the light strip
- Color wheel/color picker
- Brightness slider
For the sake of abstraction and reusability, I can also implement the functionality to add multiple light sources, each one of them having these options + a name.
AI to the rescue!
Now, let's think about the layout of the application and the actual "design". I'm not a designer so I figured I'll look for some inspiration on Midjourney.
Never used Midjourney? You deffinetely should, it's awesome. Here's a link to their official site
Since we're in the middle of an AI hype, I could use Chat GPT too, to generate prompts for Midjourney. I posted some info for Midjourney from their official docs and instructed Chat GPT to generate some prompts for me. This is one of the prompts that it came up with:
A mobile app that allows users to control the lighting in their homes. The app should have a dark color scheme, with shades of black and grey dominating the interface. The color wheel should be prominently featured, allowing users to adjust the hue and brightness of their lights with ease. The design should be clean and modern, with minimalistic icons and intuitive controls.
I posted this in the Midjouney Discord and voila, I have inspiration for my app:


Structure and purpose
Apart from the light controls I have other ideas for home automation that I would like to implement by myself in the future. For this reason, I'll do my best to make the app as generic as possible.
This will make the implementation a little bit more complex but at the end of the day, it will allow me to extend the app with new functionalities without many issues in the future.
Here's what I have in mind - instead of creating an app that has the sole purpose of controlling lights, I'll make it a generic home automation app, in which only one of the functions is the light controls. I imagine it like this:
Home (list of hubs/controls)
   - Lights (list of light sources)
       - Desk lights
       - Ceiling
       - Floor
       ...
   - Heating
   - Plant monitoring
       - Garden status
       - Indoor plants
       ...
   - ...
Bootstrapping the app
Now that I have a general idea, the next step is to bootstrap the application using create-expo-app. I'll use the ---template option which will yield several choices of how to bootstrap the project. Also, I'll name my app home for obvious reasons.
npx create-expo-app home --template
This will open a similar prompt. The choice is up to you, but I recommend starting with a blank application. In my case I'll select the Typescript option:
? Choose a template: › - Use arrow-keys. Return to submit.
    Blank
❯   Blank (TypeScript) - blank app with TypeScript enabled
    Navigation (TypeScript)
    Blank (Bare)
At this point, the app is created. I'll navigate inside the folder and I'll start it.
cd lights
yarn start
This will start the Expo server and you'll get a similar output, containing a QR Code:
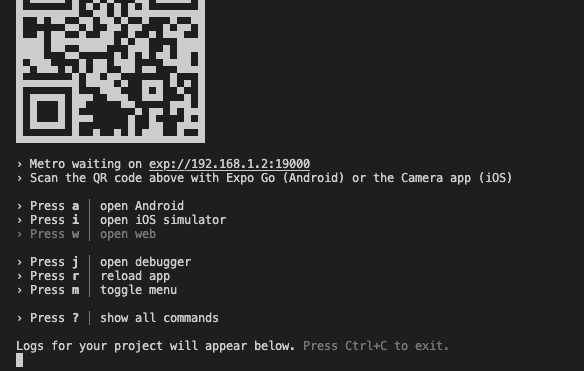
Now, navigate to the Expo Go app on your phone and start it. Select the Scan QR code option and wait for the initialization.
Note: You should be on the same network as your computer. Using VPN will most probably not work.
After everything is loaded you should see your application:
You can also test the live-reload by going to the App.tsx and changing the text. You should then see the new text on your phone right away.


🎉 At this point, I have a working bare-bones native app that I can start building upon. In the next chapter of this blog post series, I will cover the actual implementation of the application.
You can check all the source code on GitHub.